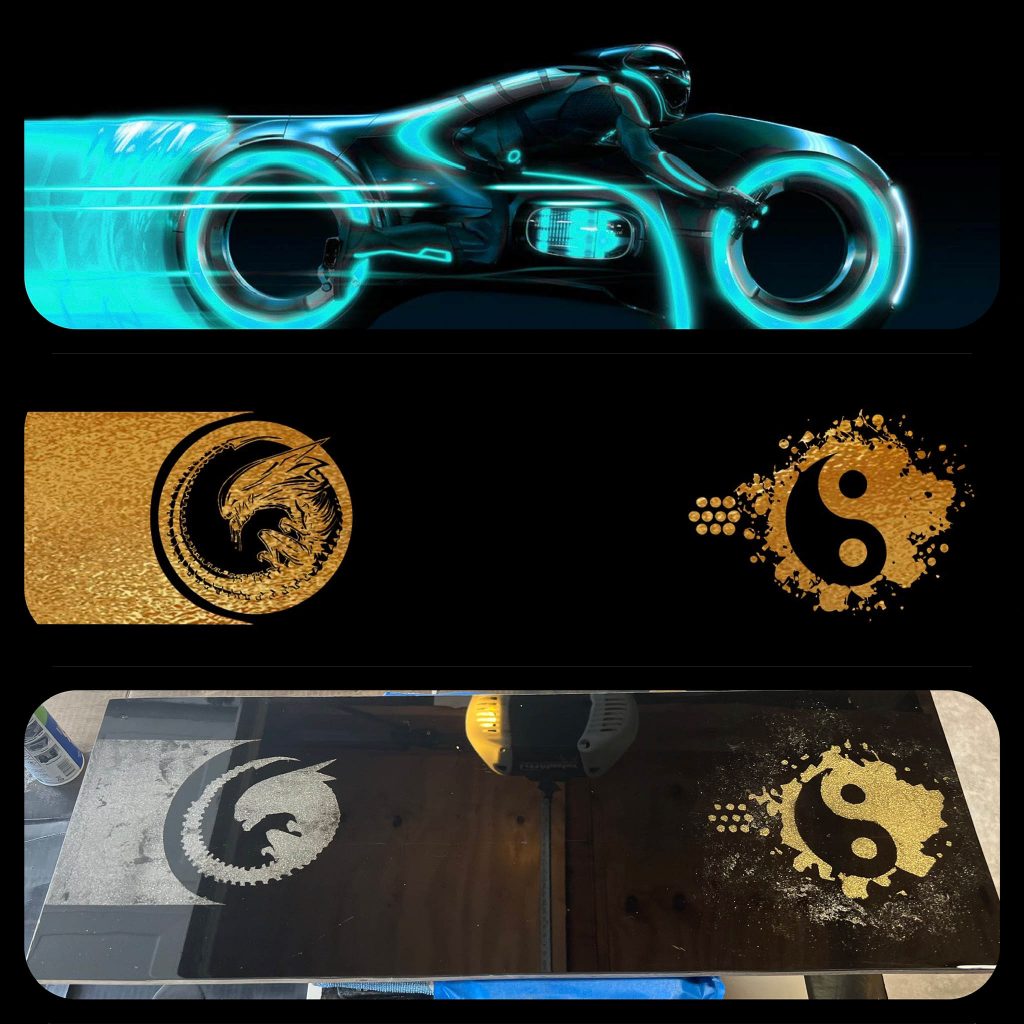
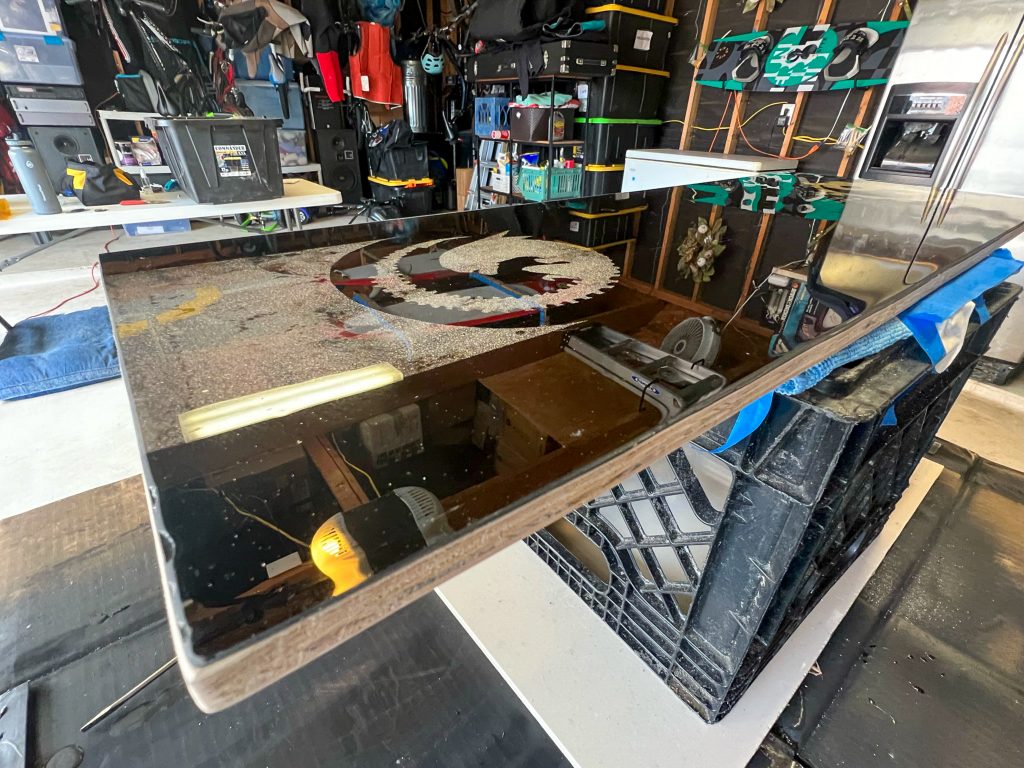
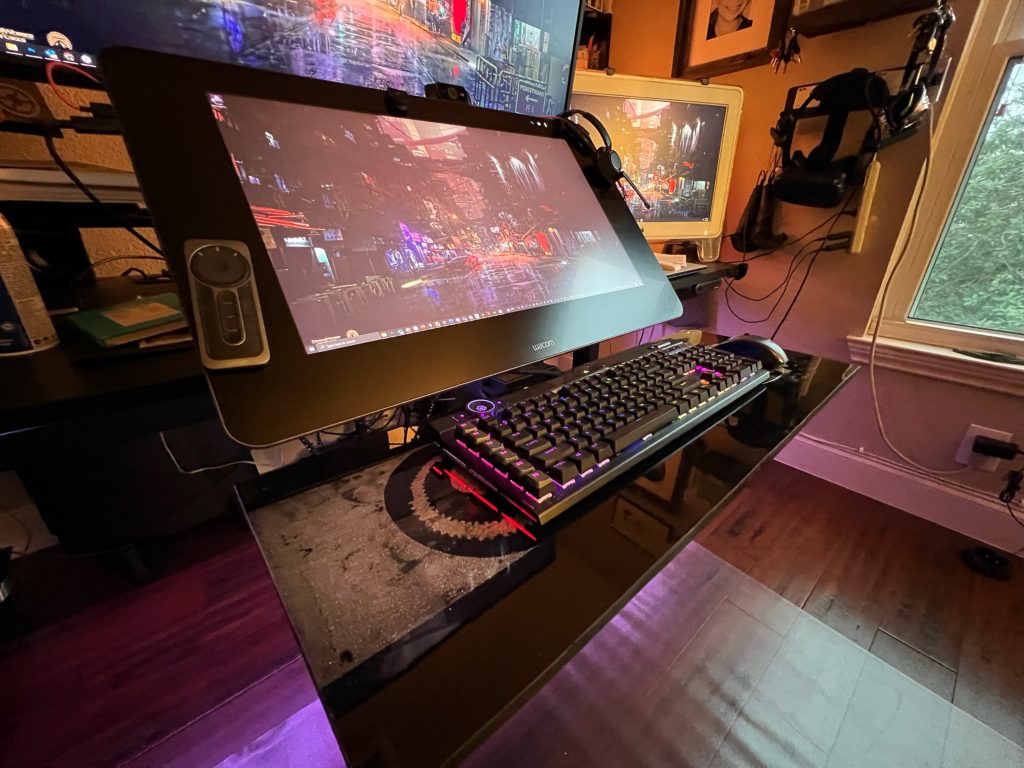
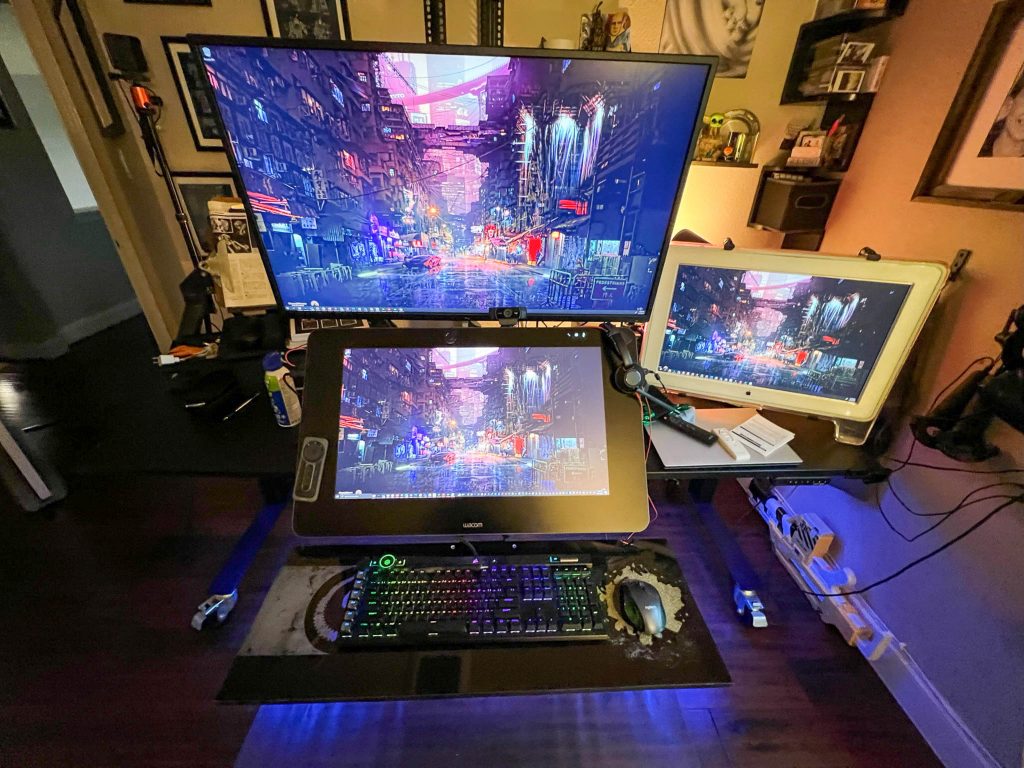
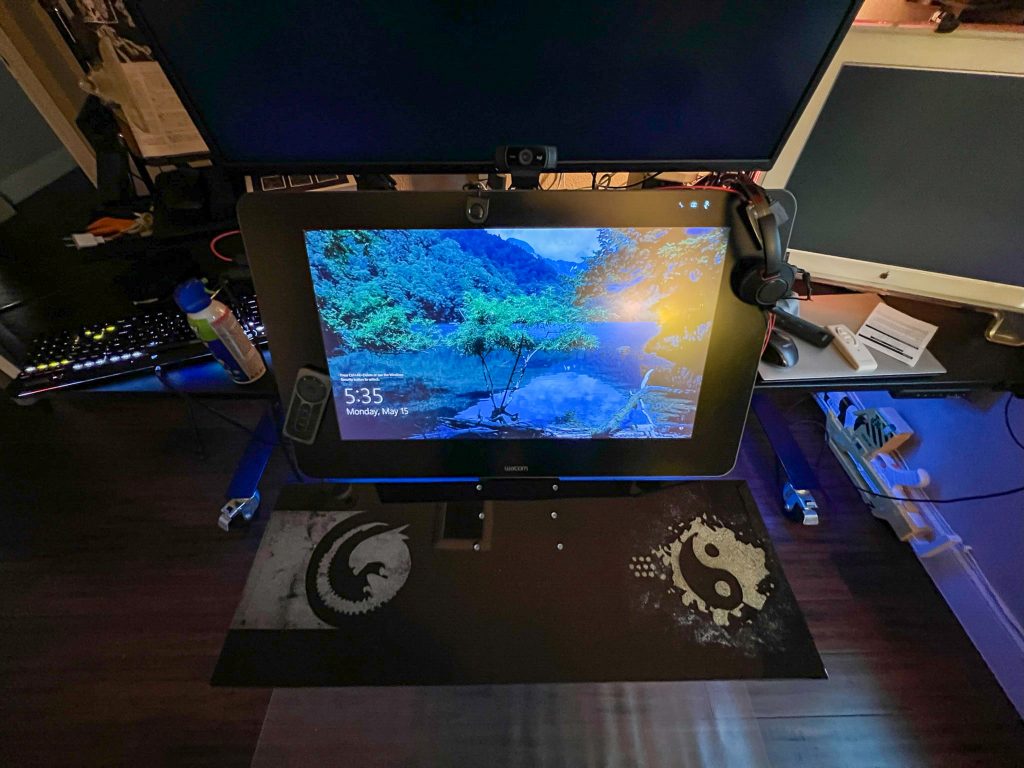
Making a new keyboard tray with some inspired style
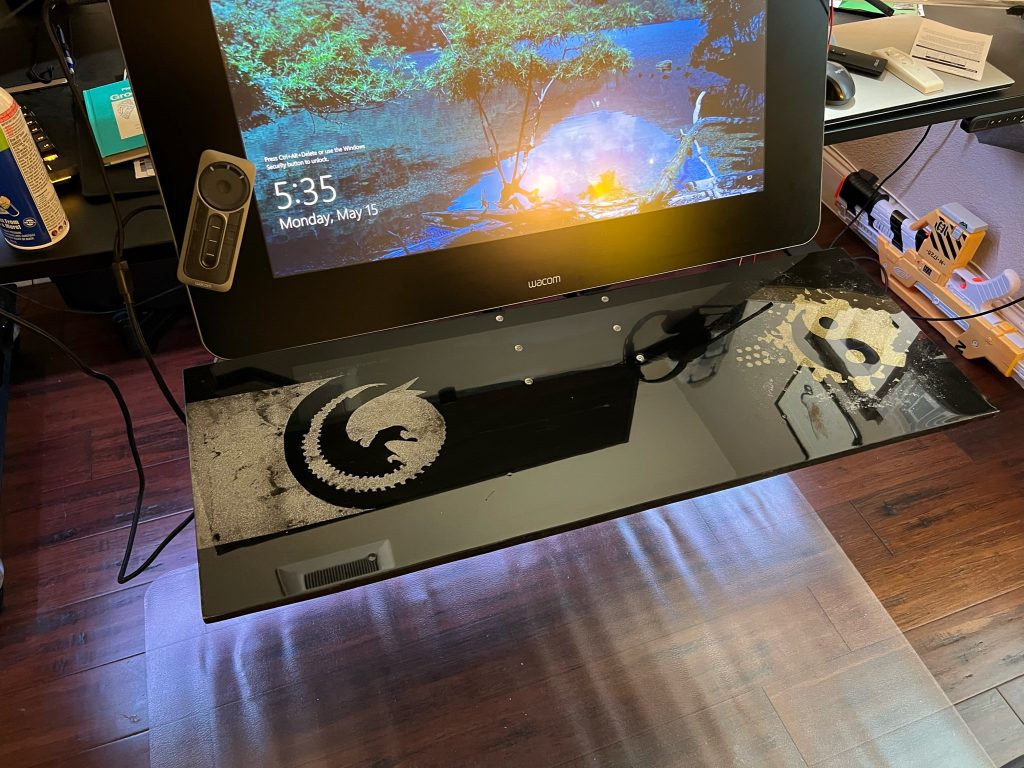
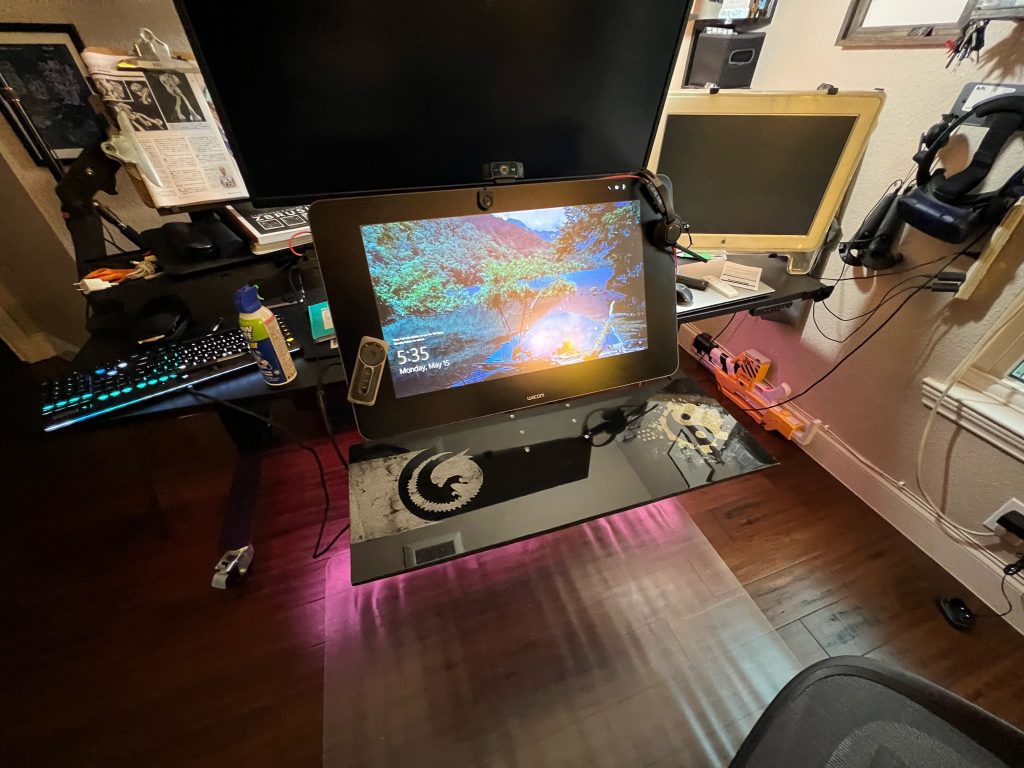
My keyboard tray has just been too small and I wanted to set my water on it and be able to doodle notes or what not. So I started this journey and learned a lot from fabrication of stencils with 2D and 3D, along with paints and lacquers. Posting notes for the archive and in case anyone else wants to dabble and learn from my successes and mistakes. The stencils I made are inspired by Tron light cycle, ying yang, and the cute little baby xenomorph, with sparkles of course.
Keyboard tray lacquer build notes
Precautionary notes:
- Wear latex or plastic gloves through out. Exception to no gloves is when working with tape. Just be sure all surfaces are dry. Otherwise tape will stick to gloves and you get imperfections.
- Work in your shop or garage.
- Keep the dogs and kids away or locked out while using the chemicals and paints.
- Use a chemical mask. I used a 3M filtered mask throughout with protective eyewear. It’s also Texas and free time so I often used a sweatband to capture my Nordic sweat.
Stencils

- Make some art.
- Stencils in Illustrator with Photoshop pre visualization. Ideate. Make it cool and yours. Be sure to pay attention to positive and negative space. Helps to go to Photoshop with a pasted vector shape later as a mask and apply a glitter texture to view. Shape and play as necessary. Remember tiny creases and sharp areas may (will) bleed with spray paint and stencil cutting errors et cetera.
- Print on standard paper black and white.
- Tape paper print to thick water color paper.
- Cut stencils through with razor pen blades with a rubber or cardboard backed surface that is secured to table.
- For inverted holes, cut painters masking tape for that part of the stencil. Always scrape off with finger nail to avoid divots and chips with razor or screw driver.
- For glitter spray paint, constantly clear nozzle with paper towel wipe and shake vigorously throughout to prevent clogging. This can include removing the top and using a paper towel and q tip to reduced clogging.
- For 3d print stencils be sure proper thick by 4mm or more. Print cut outs as well or use painter masking tape. 3d printed Stencil can be used on tape as an outline with razor too.
Pre assembly design
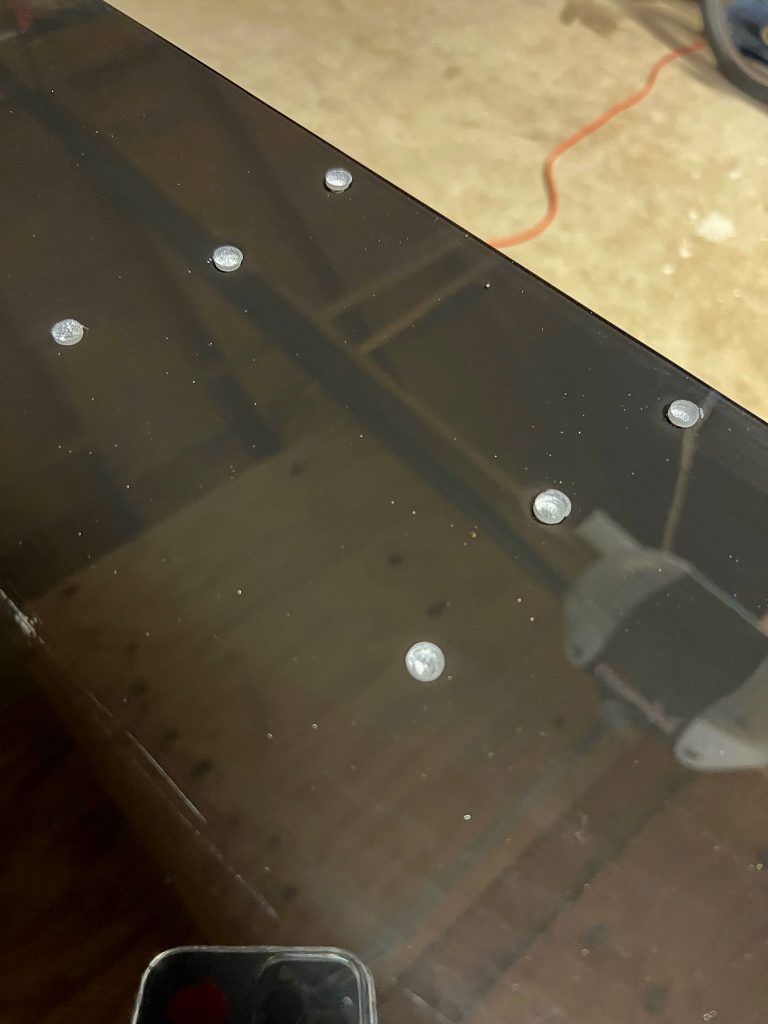
- If you’re putting holes in like I did for keyboard tray assembly, pre drill. I went though from bottom and sanded top side after. I used a bit to match size of keyboard tray assembly screw bit.
- On top side use a larger drill bit to go into board 2-3mm for a beveled inset edge. This all depends on your wood size. Mine is 1cm thick.
- For extra due diligence I inserted a washer for each hole, top side, to catch or grasp the screw later on assembly.
- Please note if you pre drill holes, the lacquer can drip through and cause adhesion to beneath layers of towelettes and ceramic which could require peeling, splitting and more sanding.
Lacquer topping
- Purchase 20 paint stir sticks.
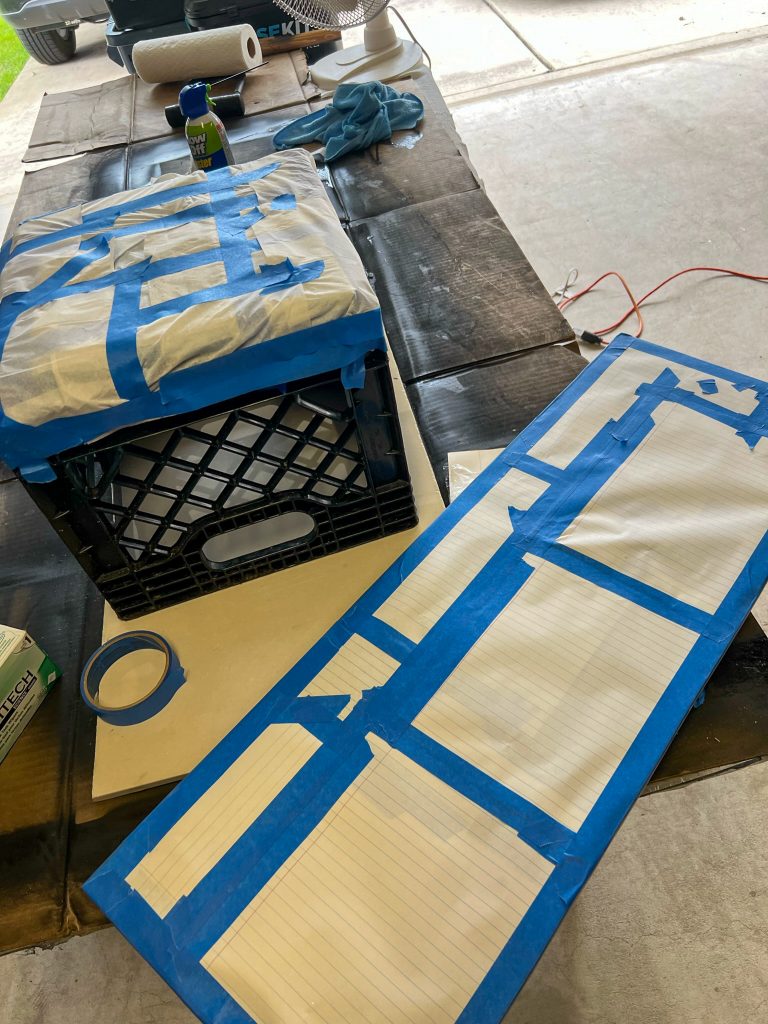
- Layout border of entire board with masking tape and sticks to create a tray around the board to lacquer.
- Line the masking tape with clear packing tape to create a seal. Masking tape is porous and will bind with lacquer binding agent. It will be difficult to remove without cutting around or off using a table or circular saw. I inverted the masking tape on itself to create a seal to both painters stick make shift tray and the board to be sealed. I used a mix. It’s possibly best to use clear packing tape across the gamut of this. But I didn’t so that’s a postulation.
- Be sure to sand with light grit the surface and wipe with water dampened microfiber cloth to allow adhesion.
- Purchase metric disposable graduated cylinders and beakers to accurately measure resin to hardener.
- If it says to mix for 3 minutes by hand, mix it for 6. Be thorough and mix with paint stirring stick around edges to completely mix all agents.
- If your beaker is 500ml do not pour over 400ml total volume. It will spill otherwise while mixing.
- Ensure your surfaces are clean, dust free, and level. Emphasis on level. Use a level to be sure.
- For surfaces, I used a flat plastic catering table, topped with paper towels, then a layer of cardboard, topped with ceramic tile to place the tray of conformed painting sticks with layered tape. Remember packing tape non sticky side will not bind with lacquer to peel off upon curing.
- Once level and secured on top and bottom, place the board to be lacquered into the tray on top of the ceramic tiles on your level surface.
- Mix resin and hardening agents in beaker for 6 minutes constantly and thoroughly.
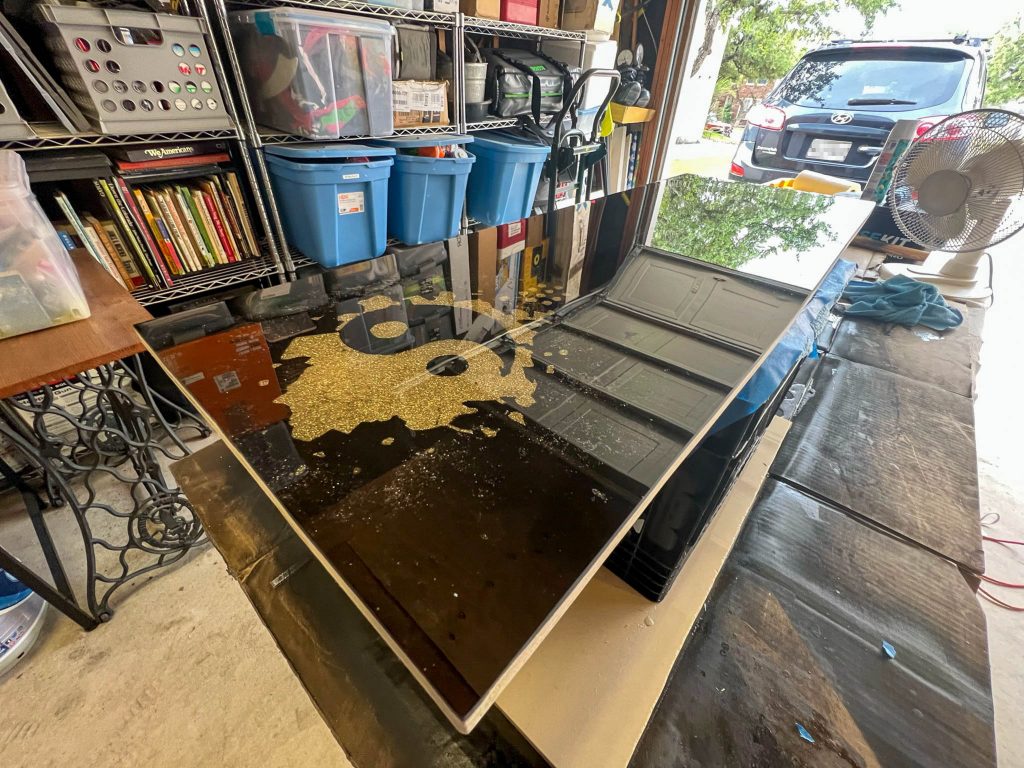
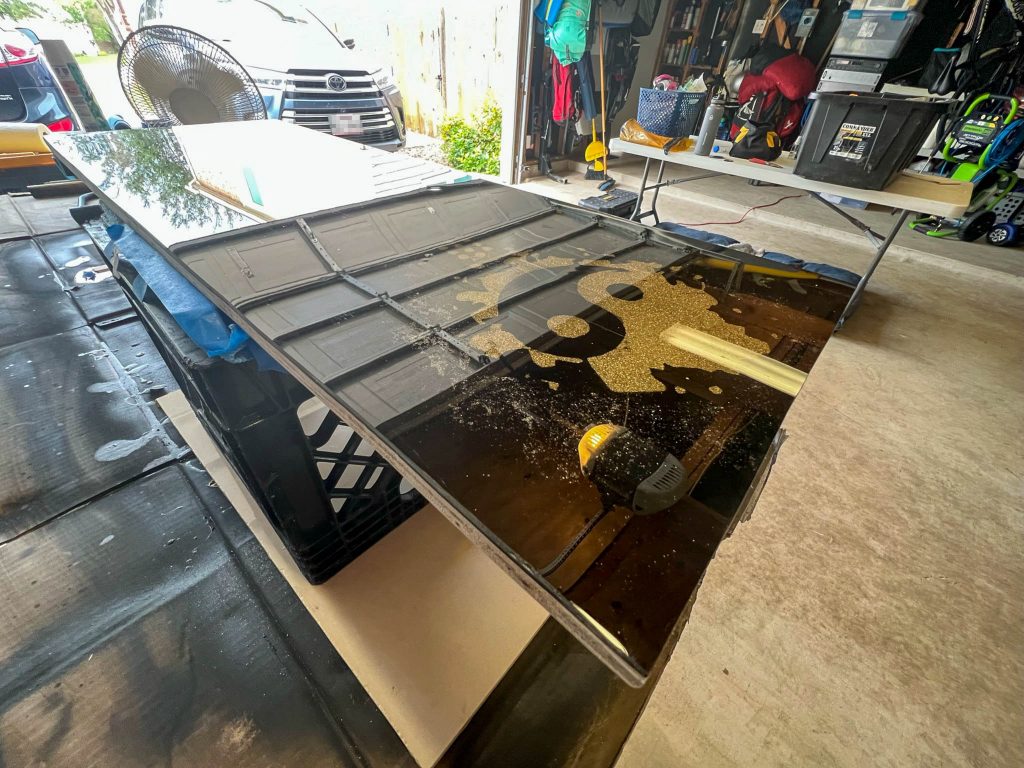
- Slowly decant mixture onto project board evenly and distribute using a respectively sized plastic squeegee. Ensure you cover the whole project and let it drizzle into your pour tray.
- Use a blow drier or heat gun about a hand to arm length from surface to remove air bubbles. Do not get too close or you will make waves in the surface.
- Cover with a large plastic storage bin to prevent dust and hair from touching and collecting into your final masterpiece.
- Cure for 12 hours. Walk away. Over night. It’ll be fine.
Curing and final painting
- Once cured, remove cover, and detach your makeshift tray from the sides. You may have to use a flat screwdriver and hammer to wedge and pry loose on all ends, from tray to ceramic tiles.
- Use fingers, pliers, hemostat to remove tape.
- Once all debris is removed, use microfiber clothes dampened with dash of vinegar and water to clean the lacquered surface.
- Use additional dry microfiber clothes to lay down on a new clean surface with paper towels and lens cleaning towelettes to make a flat non texturized surface to flip the board over.
- Cut with circular saw to remove edges of lacquer and wood overlapped. I did not use a table saw so that may be more accurate but also would scratch the lacquer face down. I’m that case, cut face up, lacquered side, and slice excess edges.
- Use a palm sander with coarse grit to even the imperfections on the edges. Take care on the lacquer side.
- Use a palm sander with fine grit to polish the edges. Again take care on the lacquered side to not grind too much off.
- Flip board over, lacquered side down, onto a tile+microfiber+paper towel+lens towelette surface with masked tape to hold.
- Sand down and wipe clean
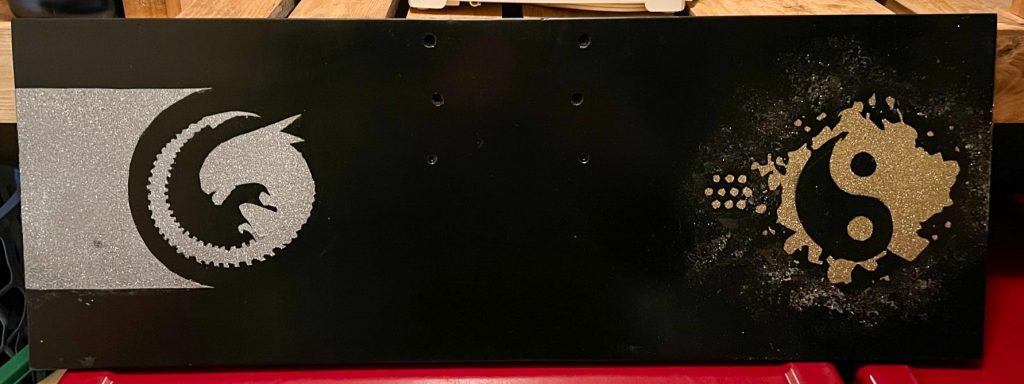
- Apply final layer or two or three of bottom spray paint.
- Dry
Installation
- Using keyboard tray screw hole template, drill from bottom side using screw size bit. Palm or hand sand using fine grit.
- On lacquered side use a drill bit 2mm larger in diameter to create a recessed indention 2mm deep.
- Hand sand or use razor blade to remove delicate imperfections.
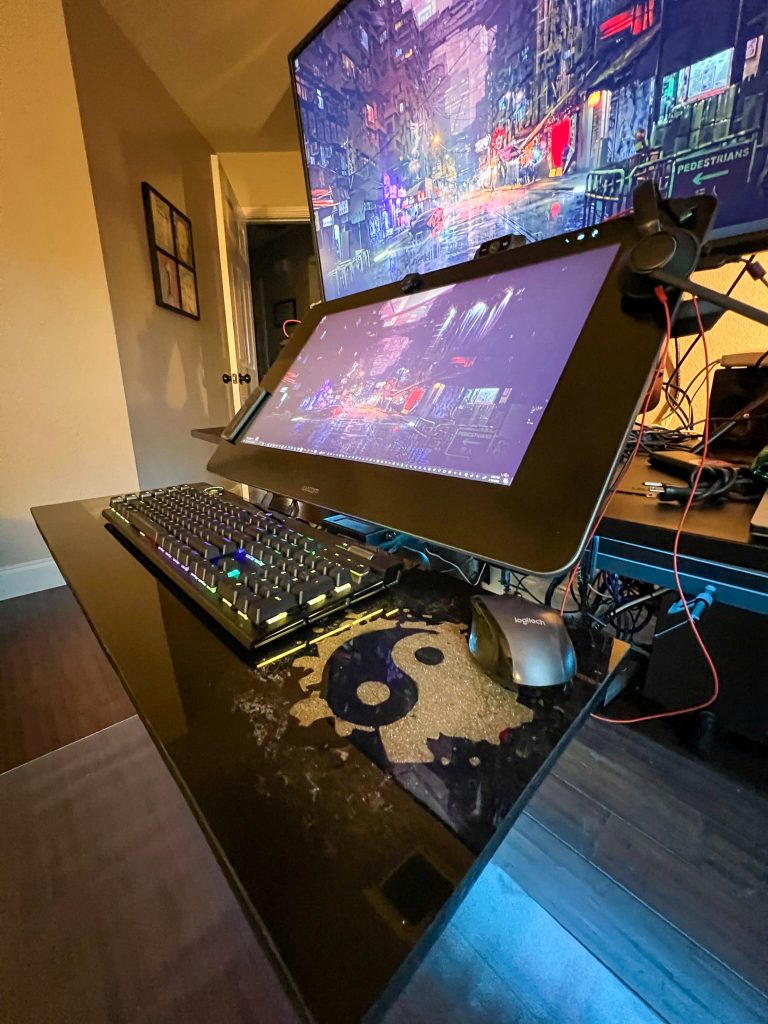
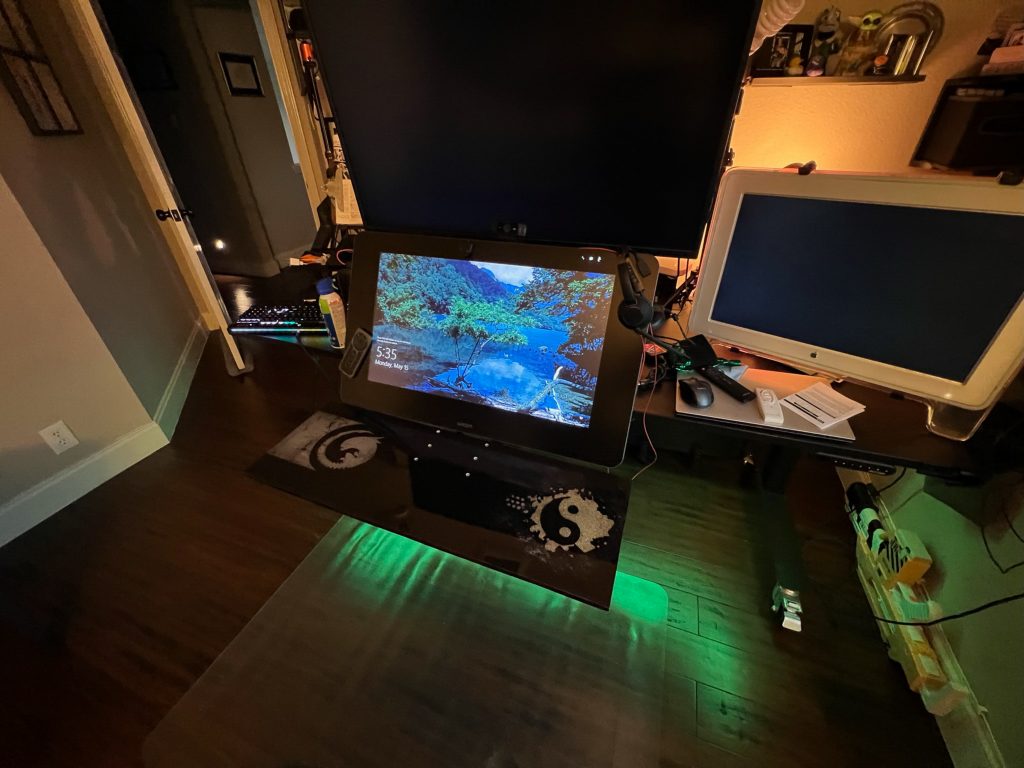
- Attach to desk tray
- Place keyboard and mouse on it and enjoy and do some more CG work.
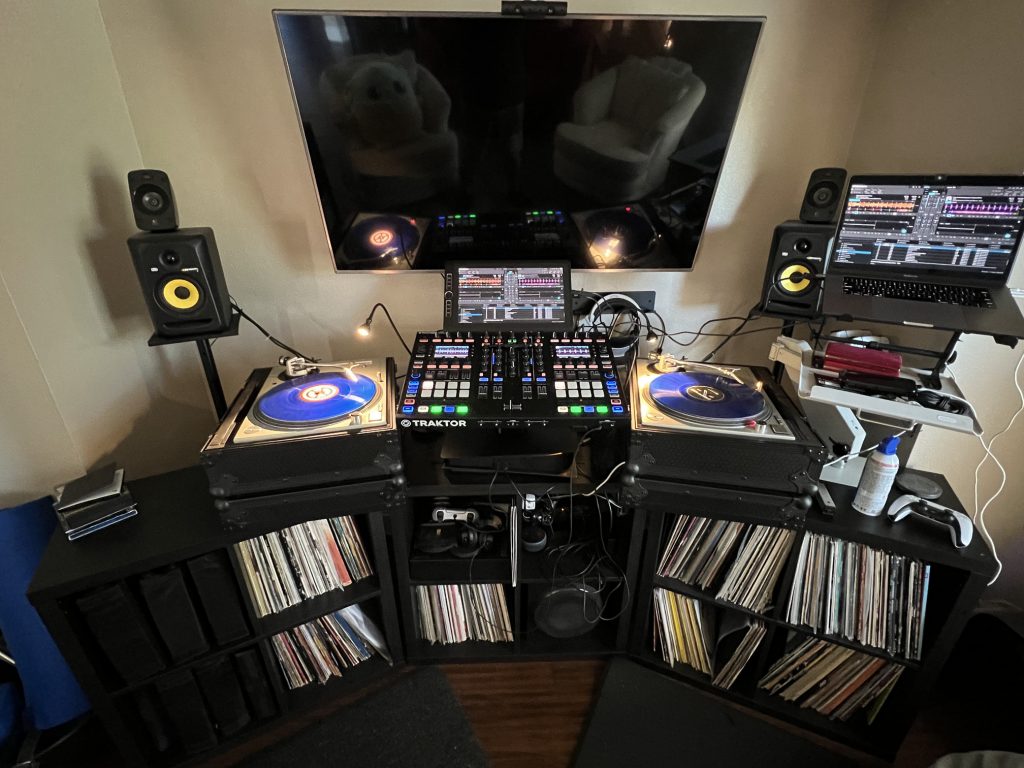
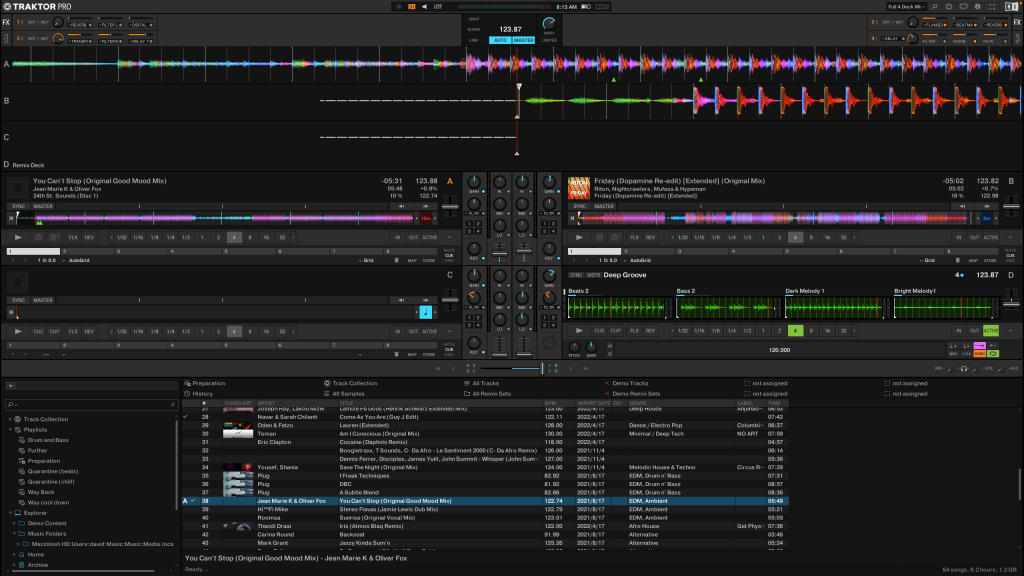
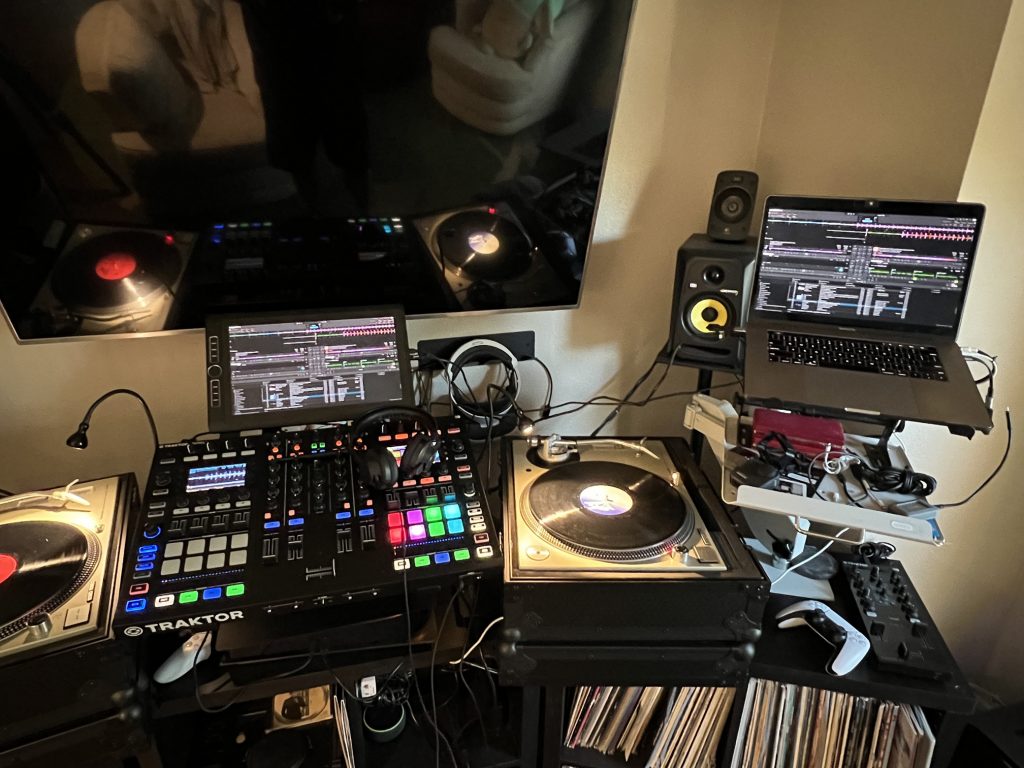
Customizing Native Instruments Traktor 3 for MacBook Pro
Making notes here for getting my custom S8 setup on my MacBook Pro 2019
First steps are making sure the screen does not hibernate or go to sleep. I use Caffeine. The app works great and you can turn it off easily on the system tray menu if you want default MacBook behavior. Now your MacBook will not turn off when you’re an hour into a sweet set. https://caffeinated.app/
Next, let’s create a custom layout. I like mine to look a little more like Serato or RekordBox. Under Traktor settings, go to upper right pull down menu and choose mixer.
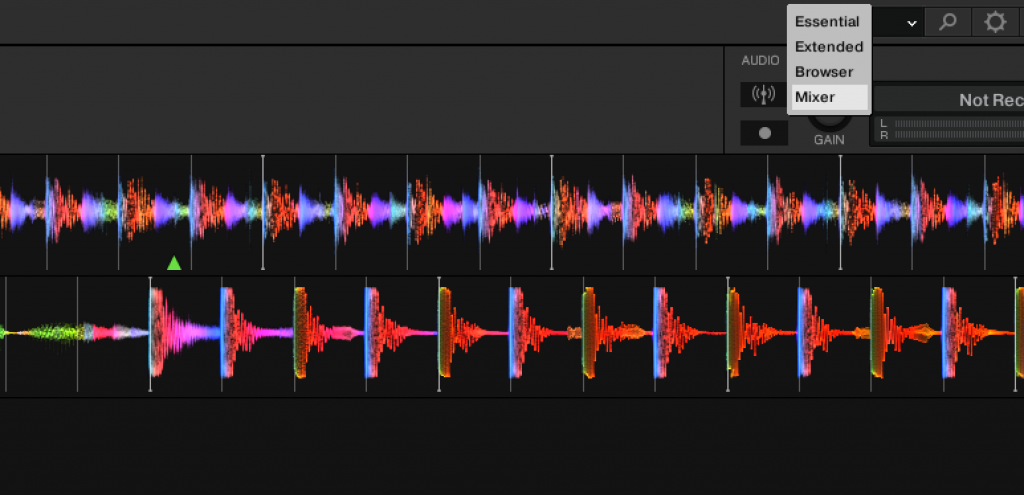

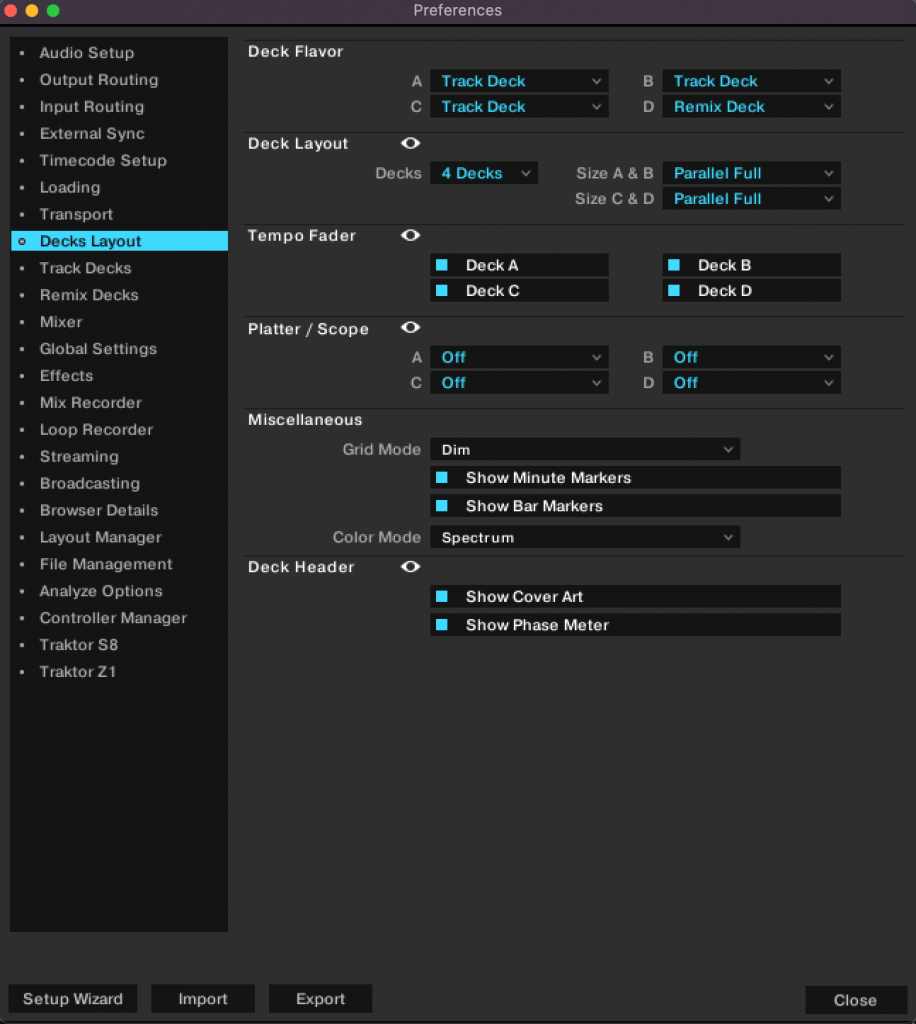
Go to Decks Layout and customize for full 4 decks with parallel full display.
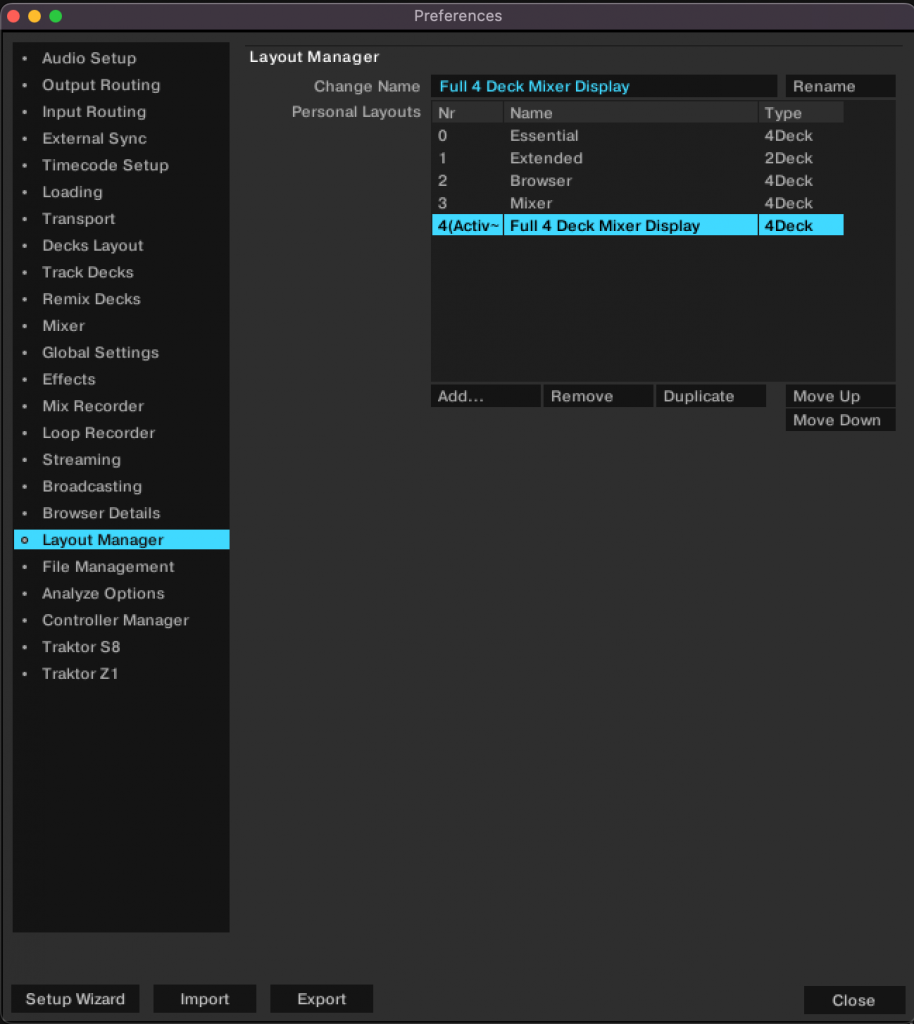
Then shift over and setup your new deck layout.
- 4 decks, parallel full
- Grid mode: dim
- Show Minute Markers: on
- Show Bar Markers: on
- Color mode: spectrum
- Show cover art: on
- Show Phase Meter: on
Close to save these settings. I would recommend closing Traktor and reopening at this time to force the save preferences for subsequent reboots.
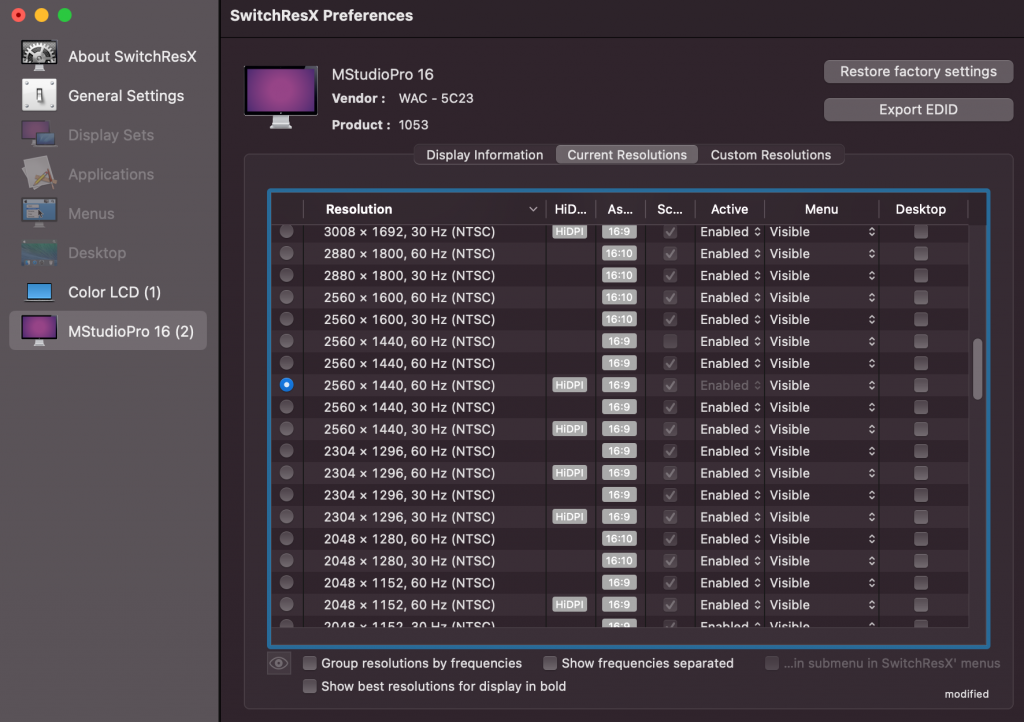
At this point on a MacBook Pro 15, which is what I have, the screen real estate may feel crowded. It is. But maybe you’re near sited and have glasses and want all these options up in front. Perhaps you even have a Wacom Mobile studio tablet in front of your mixer for quick access, but it is still 16 so you suffer the same crowded setup. If you go to default system preferences under display properties and try to scale it may be somewhat limiting. But it can be unlocked, without having to do developer hacks. This great little tool SwitchRes will unlock your preferences and you can scale up your screen size to get a nice layout that is still readable. https://www.madrau.com/srx_download/download.html (14 euro)
Be sure to get all the remix sets from Traktor as well:
Hardware Overview:
- Monterey 12.5
- Model Name: MacBook Pro
- Model Identifier: MacBookPro15,3
- Processor Name: 6-Core Intel Core i7
- Processor Speed: 2.6 GHz
- Number of Processors: 1
- Total Number of Cores: 6
- L2 Cache (per Core): 256 KB
- L3 Cache: 9 MB
- Hyper-Threading Technology: Enabled
- Memory: 32 GB
- System Firmware Version: 1731.140.2.0.0 (iBridge: 19.16.16064.0.0,0)
- OS Loader Version: 540.120.3~19
Random math and rigging links
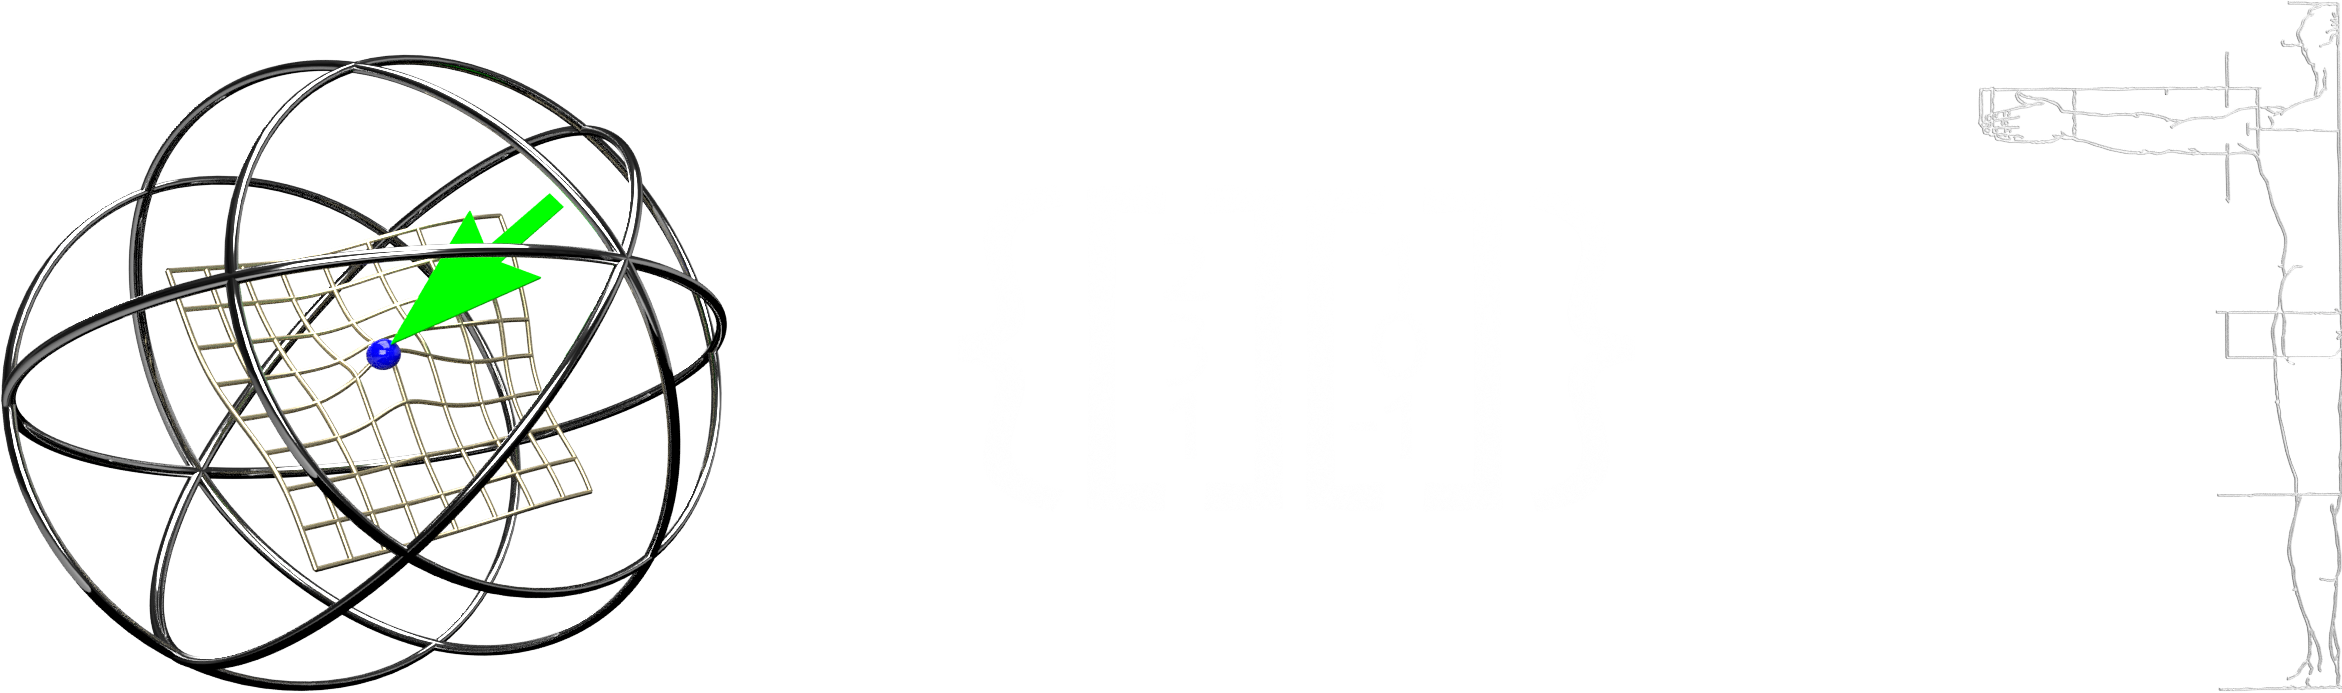
As I dig into various methods and procedures for CG work, I find little bits of information I keep referring back to. Other times it’s just a random slice to get me over a hump. I trust if you found this, you’ll find it helpful.
General concepts:
- Closest pair of points problem
- Euclidean vector
- Matplotlib examples
- Linear algebra
- Maya rigging wiki 3d-math
Math in 3D:
Maya concepts:
Art, Science and Technical Blogs:
- Brave Rabbit
- CG Monks
- Chad Vernon
- Creature Rigs
- Cult of rig
- Jeremy Ernst
- Lee Dunham
- Marin Petrov
- Melinda Ozel
- mGear Framework
- Nathan Horne
- Red 9 Consultancy
- Rigging Dojo
Maya gems:
- Quickly retrieve vertex positions of a mesh
- Figuring out the maya python api
- Tutorial skinWeights
- Maya python querying soft selection
- Closet point edges to locator
- Membrane
- Fit B Spline
- Poly Duplicate And Connect
- Poly List Component Conversion
- Copy Deformer Weights
- Skincluster weights in maya
- Mesh locator
Tools and repos:
- https://github.com/bungnoid/glTools
- https://code.google.com/archive/p/zootoolbox/
- https://sites.google.com/site/mayariggingwiki/python
- https://code.google.com/archive/p/alembic/
Videos:
Uncategorized:
R’Amen
Religious freedom in a nutshell.
“The reason democracy is failing and science is ignored is not because of Mark Zuckerberg (although he’s not helping), it’s because the system is designed to value belief over fact.”
https://www.thedailybeast.com/these-wonderfully-weird-people-worship-a-flying-spaghetti-monster
Challenger Deep
Journey to the bottom of the sea.
Read more on Wikipedia on the trench.
Mariana Trench
https://goo.gl/maps/rDwtfh6PRzfd8bfM8
Some cool stats on atmospheric depth
And a rabbit hole of course. Would You Float At The Core Of The Earth? – Forbes

Some recent fascinating CG things.
- https://youtu.be/86xWVb4XIyE
https://youtu.be/J90VETgWIDg - https://forums.unrealengine.com/unreal-engine/events/1679191-iliad-intelligent-layered-imaging-architecture-for-drawing-october-31-live-from-hq
- https://youtu.be/pW6nZXeWlGM
- https://80.lv/articles/open-source-painting-tool-for-3d-artists/
- https://www.geogebra.org/m/xMYUCkEa
- https://80.lv/articles/tutorial-frayed-edges-in-zbrush/
- http://xavierdorion.weebly.com/meshlocator.html
- http://www.braverabbit.com/braverabbit/
- https://www.cgmonks.com
- http://red9consultancy.com
- https://www.riggingdojo.com
- http://www.mgear-framework.com
- https://vimeo.com/342926245
- https://tinyurl.com/y7je4myt
- https://devblogs.nvidia.com/introduction-turing-mesh-shaders/
- https://youtu.be/p98g7Omvwhg
- https://www.linkedin.com/pulse/creating-advanced-spine-rigging-system-maya-2020-kevin-borjon-piron

Rabbit holes are meant to be fallen into

Been accused of falling into these repeatedly by coworkers like it is a bad thing. So today in raining, sheltered seclusion, I begin some rabbit hole discoveries. Like my rants on social media, mixes I assemble, or pontifications I give to my son, if you don’t read or listen or care, I’m still here. I’m not bothered either way. I’ll try not to insert too much commentary either, but more anecdotal musings and fact pointers for y’all to read or not at your leisure. Cheers!
Today’s rabbit hole falls down this path…
Hank Williams
https://en.wikipedia.org/wiki/Hank_Williams
Trent Reznor
https://en.wikipedia.org/wiki/Trent_Reznor
Genesis P-Orridge
https://en.wikipedia.org/wiki/Genesis_P-Orridge
https://news.artnet.com/art-world/genesis-p-orridge-died-1805331
Paul Palladino
https://www.nin.wiki/Pino_Palladino
Lindsey Buckingham
https://www.lindseybuckingham.com/
So you’ve got Trent Reznor assimilating Hank Williams, Lindsey Buckingham of Fleetwood Mac, and the very recent passing of Throbbing Gristle and Psychic TV lead transmogrified personalities… P-Orridge. All put together into a compelling piece I’d always dug but not quite put together the source parts on. It’s dark but has a sweet compelling message it. A message that always resonated with me regardless of current events making it more apropos or not.
While I’m Still Here (https://www.nin.wiki/While_I%27m_Still_Here)
Recent Comments